GTT: Coconut Chips
GTT? What's GTT you ask? Well this week I'm cheating a bit for my "Get the Look" post because we're going to "Get the Taste" instead! In case you're new around here let me introduce myself- Hi, I'm Diana and I LOVE coconut. See here & here for further evidence. It was very recently that miss Chantelle aka Hair Goddess Extraordinaire (she keeps all three of us girls looking fabulous when it comes to our pretty tresses!) introduced me to these coconut "chips" when I was at her place & it was a forever life changing experience. In addition to my love of coconut oil, shredded coconut, coconut water and coconut pretty much anything else, I now have a slightly sweet & salty, highly addictive coconut snack to add to my list. Looking for a way to cut a bit of the sugar found in the packaged ones, I thought I'd try to make my own unsweetened chips that are a bit better for the waistline. So how do you go from whole coconut to the tasty little chips? I'll show you!
What you need: Whole Coconut // Sea Salt // Hammer // Screwdriver (Ice pick, any object similar to for piercing the coconut) // Vegetable Peeler or Mandolin // Tea Towel // Bowls // Baking Pan // Patience
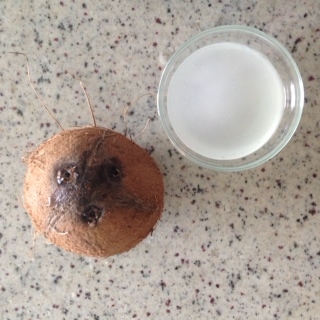
Step One: Grab your hammer, screw driver and coconut. For sanitary reasons, if you've used your screwdriver for it's actual purpose, AKA not just for bustin open coconuts, you might want to give it a quick wash to sanitize. Turn the coconut so you can see the "eyes". This is where you'll pierce at least two of the three holes; one to strain the coconut "juice" from and one to allow air into. You'll want to place the sharp end of the screwdriver against the "eye", then hit the screwdriver with the hammer so you have enough force to pierce the coconut. *Safety Tip*: If you can grab an extra set of hands to hold the coconut while you hit the screwdriver with the hammer, this process will be far easier. When you're done, it will look like this:


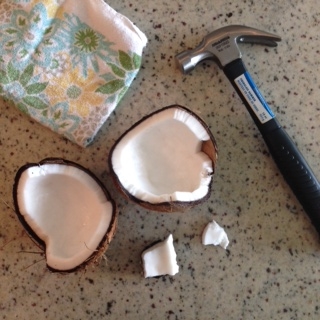
Step Two: From here, drain the coconut "juice" from the coconut. You can drink this (strain it first, it might have a few floaties from the outside of the coconut) or use it in baking, smoothies, freeze it as ice cubes, the list goes on and on- trust me, if you love coconut, it's delish! Once it's empty, wrap the coconut in a tea towel and get ready to bust her open! Wrapping the tea towel around the coconut will keep shards from flying as you'll want to give it a good hit a few times with the hammer until you hear it crack. Once you feel the coconut crack in half, unwrap and the fun begins!
Step Three: Now above when I said fun, what I really meant was work. This part isn't the easiest but the reward at the end is worth the work- trust me! Grab a butter knife and separate the meat of the coconut from the outer husk. This part shouldn't be too difficult, and don't worry if the coconut breaks up a bit while you're doing this. When you've gotten all of the meat out of the husk, it should look something like this (below left).
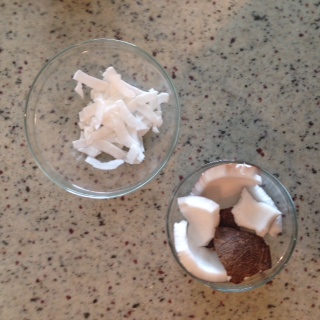
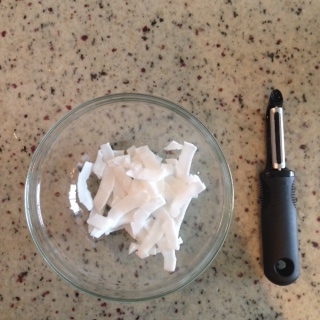
Step Four: The meat of the coconut is going to have a hard brown outer layer on the outside even after it's been removed from the shell that will need to be removed. This part isn't the easiest and if anyone has an easier way of doing it - holla at me! How I removed it is using a vegetable peeler. Once the outer layer is removed, this is when you use the vegetable peeler (or mandolin if you have) to create the strips or flakes that you'll be baking. This part of the process is the most time consuming so pull up a seat, throw on a movie and get to it.
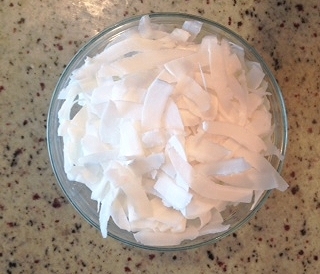
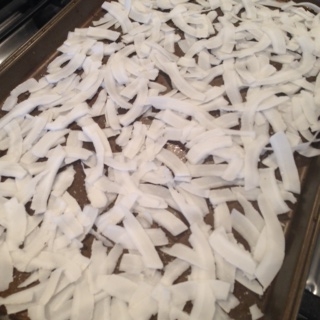
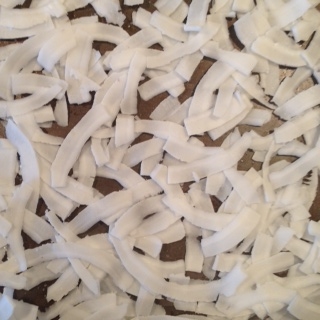
Step 5: When you're done creating the coconut strips you're going to have the prettiest, fluffiest bowl of delicious coconut- get excited! Lay out your coconut strips onto a baking tray (one coconut will need two trays) and sprinkle lightly with sea salt. In a 350 degree oven these guys will need between 10-20 minutes depending on how crispy you like your coconut chips. I set a timer to stir them a bit and check on them every 5 minutes and mine took just over 15 minutes because I like mine a bit on the crunchy side. The coconut chips are done once they're dehydrated and the edges are slightly brown.
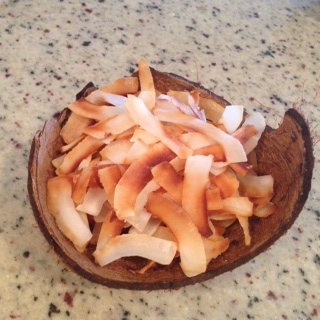
Step 6: Serve em up and enjoy! These guys are seriously addictive - so be careful. I love adding mine to salads, stir fry, trail mix or eating them on their own. Let me know if you make these and what you use them for!
