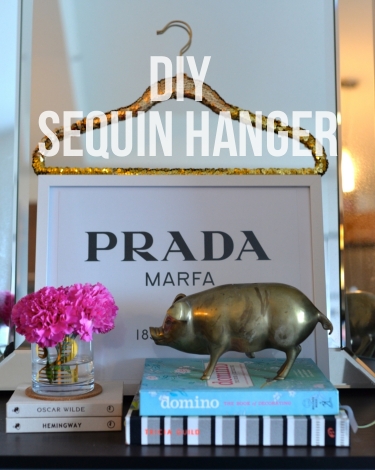
Gold Sequin Hanger DIY
By now we've all seen these fabulous gold sequin hangers online or pinterest or instagram. Today's post is not the most original DIY (I'm sure it's been done a million times!) but sometimes a DIY comes along that is just too cute and too simple to not share- so for today I've got a fabulous DIY to add a little sparkle and shine to your wardrobe without having to buy any new clothes! So if you've got 15 minutes, a hanger, some gold spray paint or a gold paint pen (optional) and $6 for sequin ribbon, you're seriously set!
Step 1: Pick a hanger (you can use plastic, metal or wood- whichever you choose will be fine!)
Step 2: Spray the metal head of the hanger that will not be covered in sequins. A gold paint pen also works. If you want to spray the whole hanger, you can do that also - that way if any space peeks through the sequin ribbon, the hanger is gold so it should hide it!

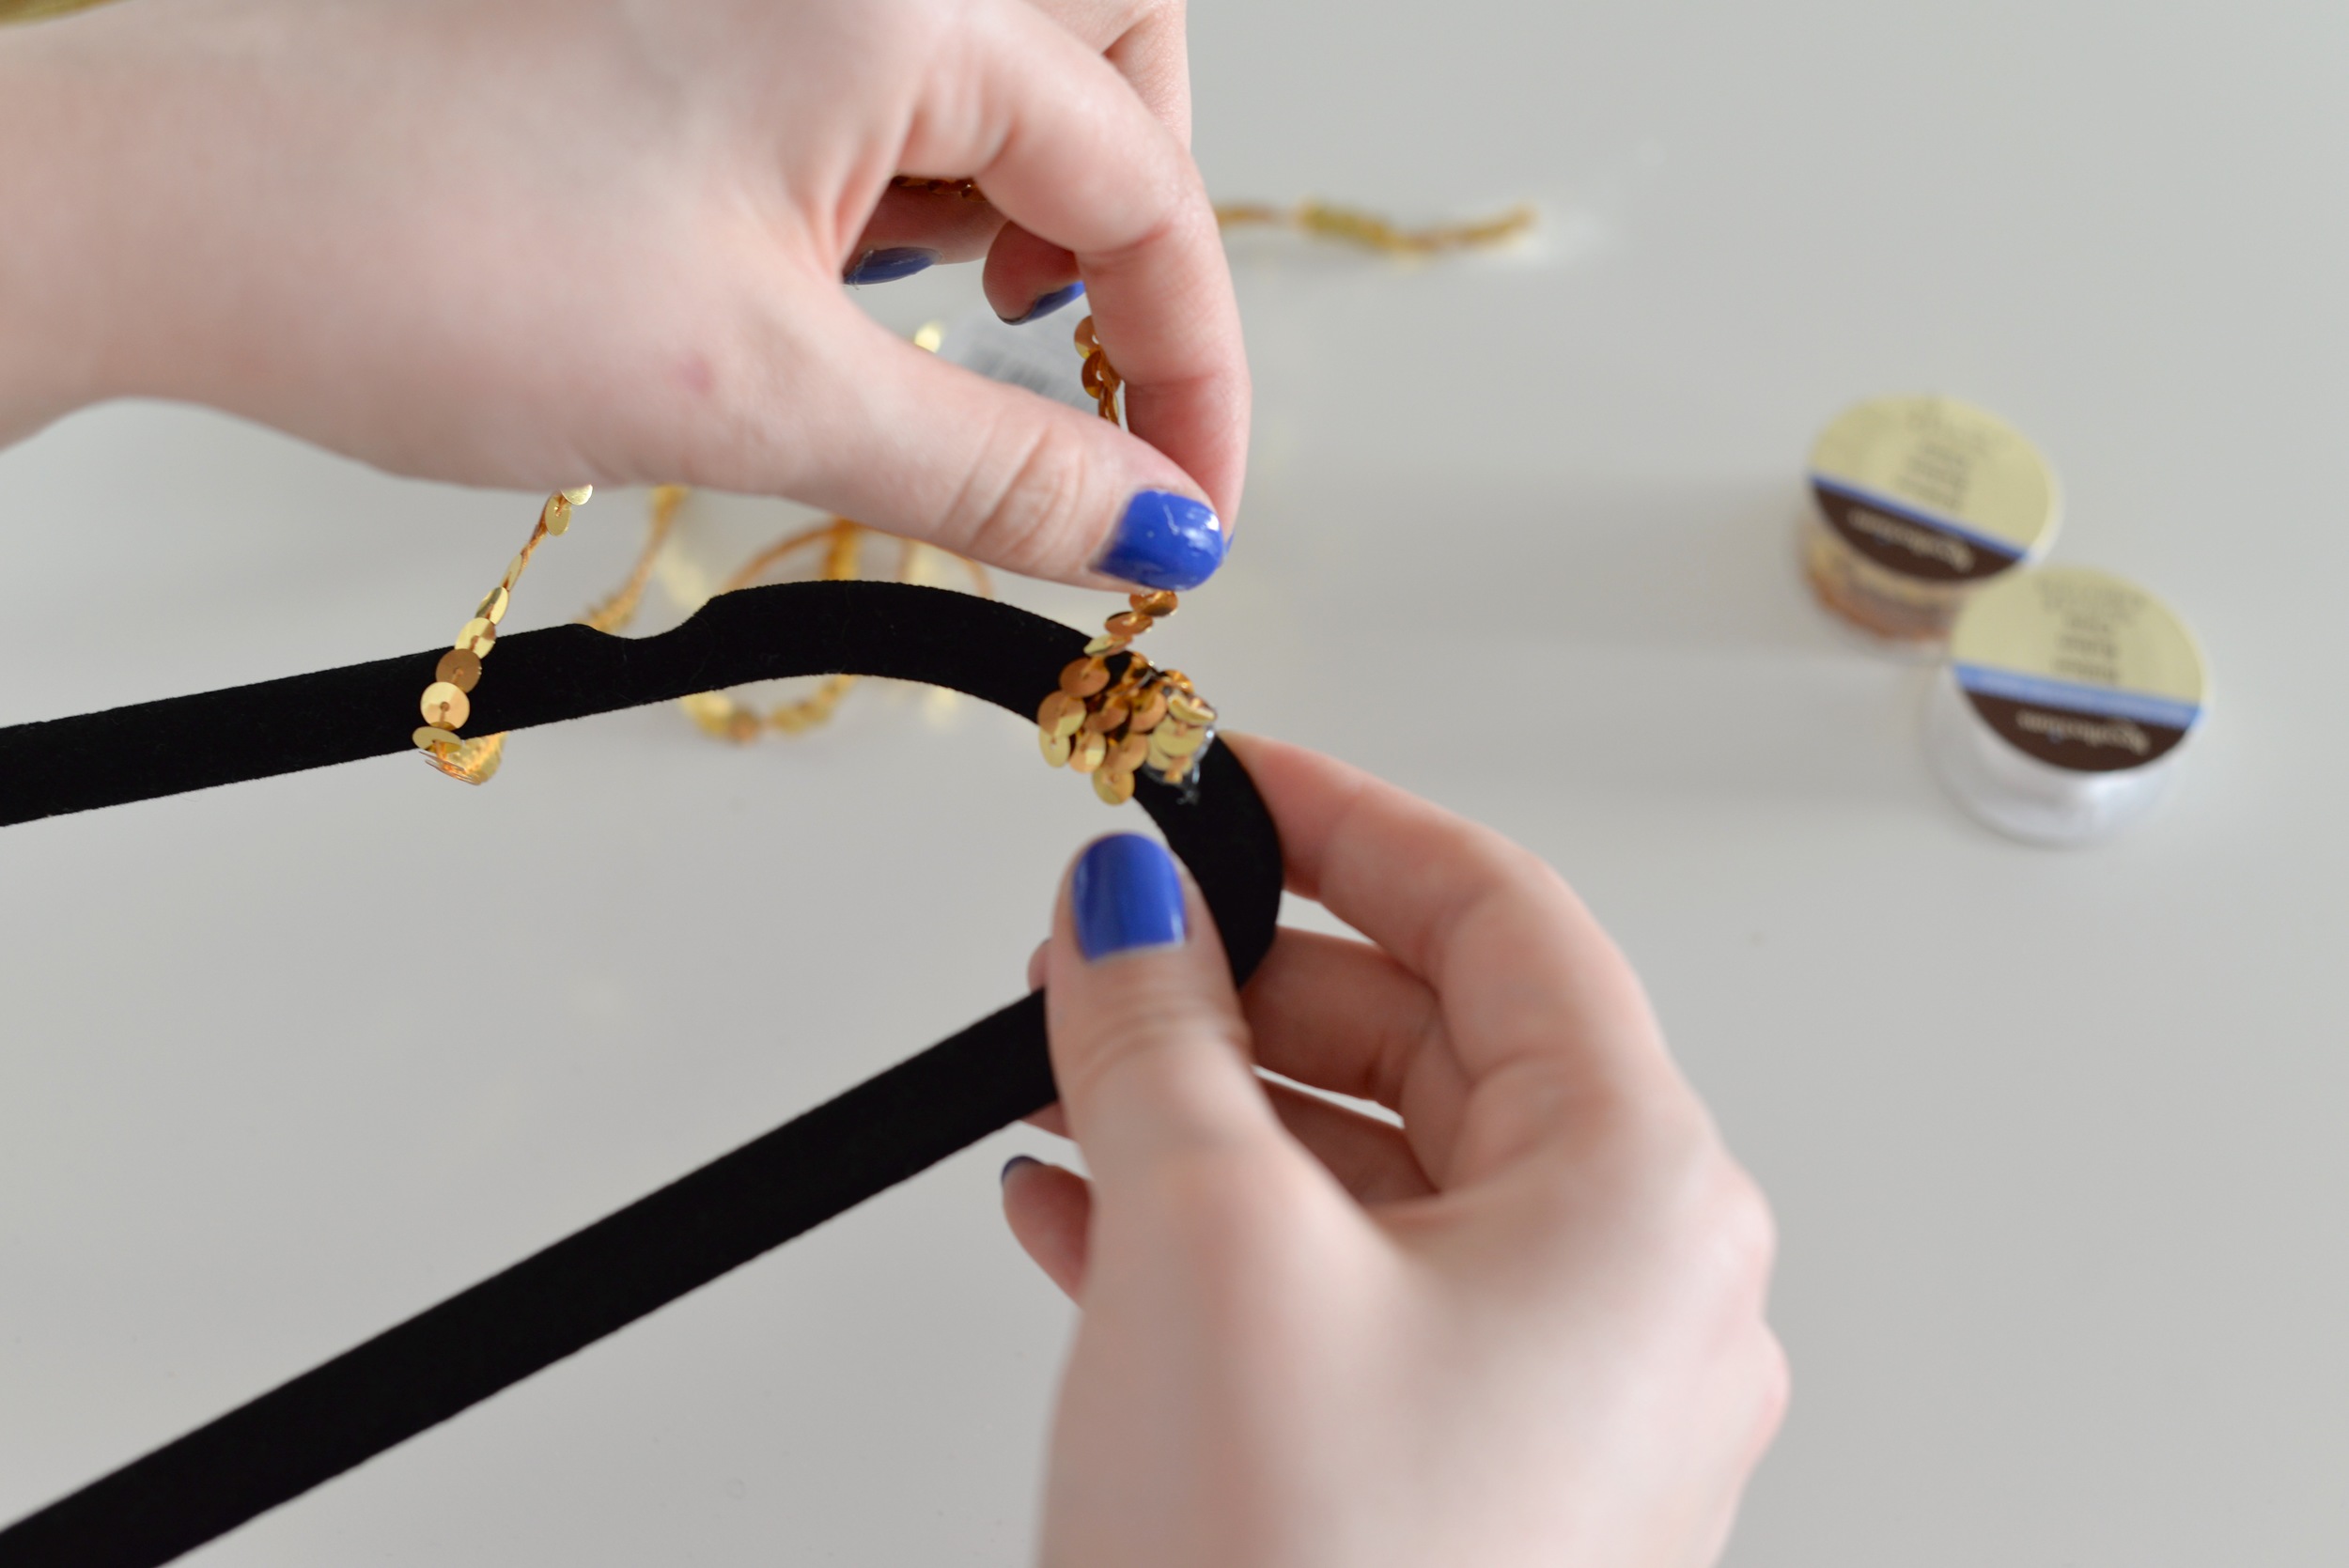
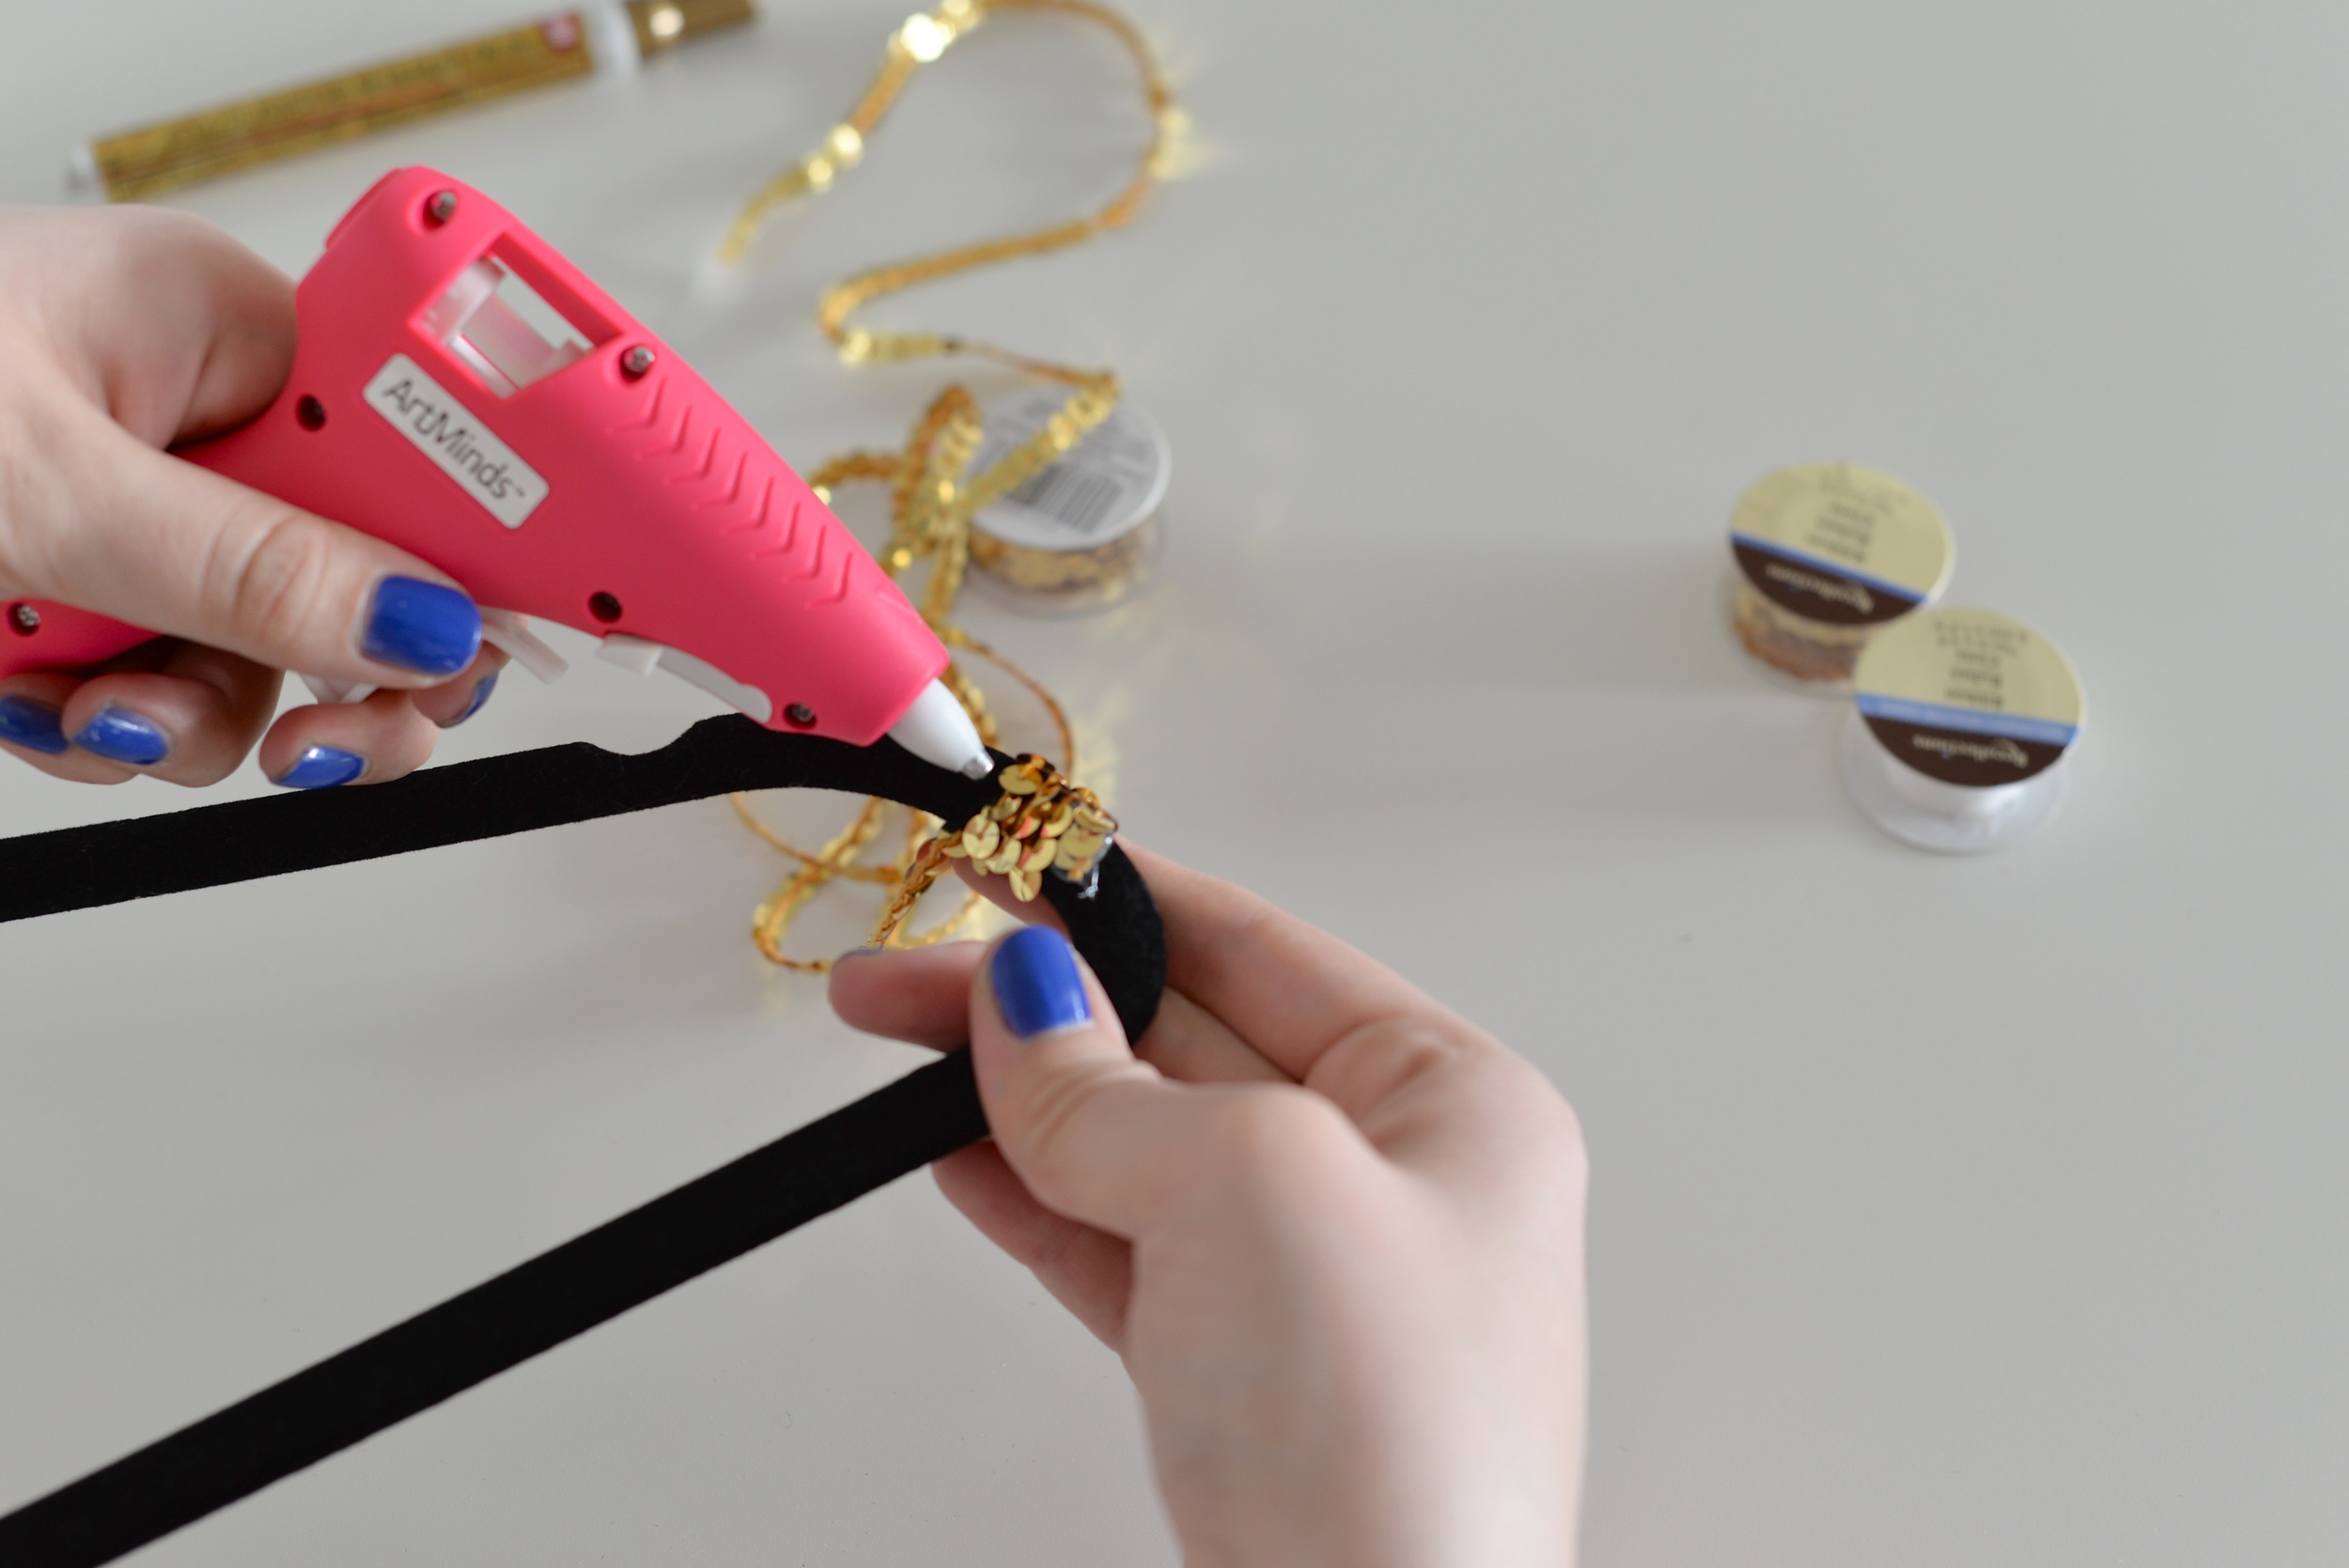
Step 3: Take your sequin ribbon ($1-2 per roll at craft store, you'll need approx 16 feet total) and using a hot glue gun or a heavy duty craft glue, glue the end of the ribbon to your starting point on the hanger (start close to the end and work your way across). Begin wrapping around the hanger, gluing along the way if necessary. Tip: I used a dab of hot glue sporadically as I wrapped the hanger to secure the sequin ribbon as I wrapped. When you get to the end, glue the end down and you're done!
Step 4: Hang and enjoy!
I wouldn't do this DIY for a full closet full of hangers but I think it's a cute idea for a few hangers, if you're planning a wedding and want a sparkly hanger for your dress photos, or if you're like me and hang your clothes for the next day on the back of your door; these sequinned hangers are much prettier to look at than the plain plastic, wood or metal ones!
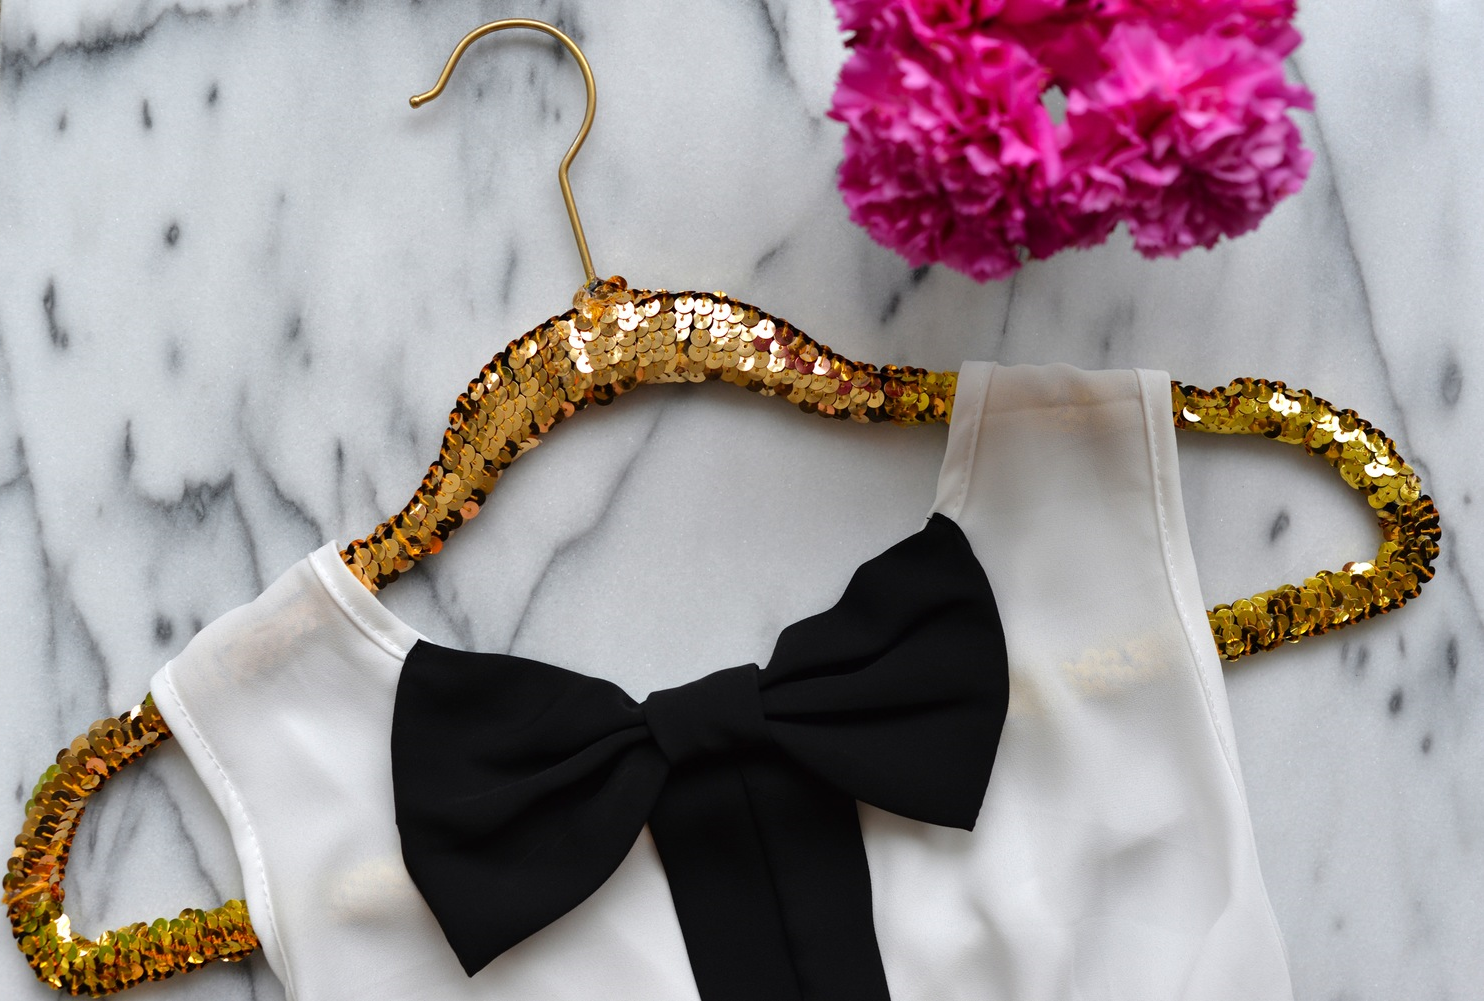
PS: Cute bow top is from this post!
Happy DIY-ing!